

WARNING!!! I am not a mastering engineer. Just wanna help beginners get to a ball park of what a master would sound like.
Mastering is something that a lot of us are a little confused about. We either think of mastering as a magical layer of unicorn tears or a simple leveling of volume. Now, there is a bit of truth to both of the views.
Mastering in general as we know it today, started in the 1960’s. A mastering engineers job was to make the songs overall volume louder (Or softer compared to the other tracks on the artists album) by using compression and eq. This became a very important role during the record release. People started to relate louder music with being “Better”. As a result of mastering, artists sold more records.
This is no different today.
For most electronic artists, whether they know it or not, the mastering process can be very creative. You can apply all sorts of effects to your mastering chain that in the past, would be considered taboo. I will go over some “traditional”, and some non-traditional techniques in the article.
I make Lofi, and Pop-Electronic music. These techniques work well with these genres and to be frank, its what works for me.
Monitoring

First of all, In order to make decisions that are based on truth, and for you to be creative, – You must use monitors/headphones that are reliable.
What i mean by this is that you should Master (and mix) on monitors or headphones with a fairly flat frequency response. The idea is that if your monitoring on a system with a flat response, you will be less likely to make judgement based upon an inaccurate output. Your monitors/headphones can be measured in order to find out if they are lying to you, but I much prefer advising you to just to buy something reliable to mix and master on.
I use AKG 240 MkII’s which are harped on by mastering engineers because first of all; They’re headphones. Secondly, they’re frequency response isn’t exactly full, especially in the low end. I know this, yet my best mix and masters have been made on this for one main reason – I know them inside an out.
Most likely, your like the rest of us and you cant afford expensive monitors or headphones, Simply get something thats reliable and use them every day along side of a reference track – Which is next.
Referencing

Referencing is basically just pulling in one of your favorite commercial tunes and comparing yours to theirs.
Firstly, make sure both the reference and your master are at the same level (By ear).
Then simply listen to the differences of both yours and the pro’s track. Most likely you will cry, but thats okay. Let us make gold out of tears.
Focus on the three ranges of the spectrum – Low, Mid, High. How does the reference song match up to yours in these areas? If they are drastically different, now is the time to go back to the mix and makes some adjustments.
Now listening to how dynamic the track is and compare this to yours. Is the reference totally bricked at 0db the whole way or does it have some dynamic range?
Mix INTO your mastering chain
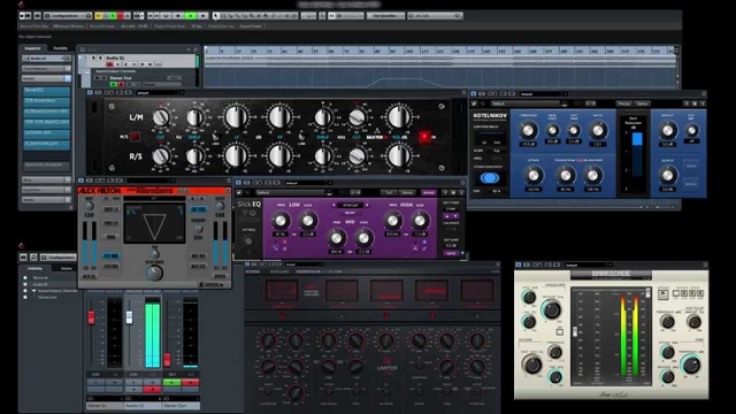
Something i cant stress enough is to mix INTO your mastering chain. The idea of mixing into your mastering chain is so you know exactly how the end result will sound. The total control isn’t something you should miss out on. Too many times have i made a song that sounds great in the mix, then when i apply a mastering chain later, the overall mix changes drastically. That why i suggest Just setting up a mastering chain before you even start the creative process. Below, I will supply a chain that has been successful for me over the years. Feel free to have your own opinions and adjustments.
1.) EQ
This is a very important step that so many people over look. Your individual sounds and bus’s may sound balanced and no frequencies may sound like their building up. The thing is, when all sounds are combined, you most likely will have too much of a specific frequency.
Simply take a bell shaped notch with a high q and boost by 6db. Then sweep across the spectrum to find anything that is undesirable. This part can be very subjective but as long as you have an idea of what sounds good or bad to you, that is all that matters. Thats why mastering is a creative process as it is clinical. I always find at least 3 frequencies that could be reduced in volume. 3.5 k, 9 k, and 400 hz are areas that usually bother me.
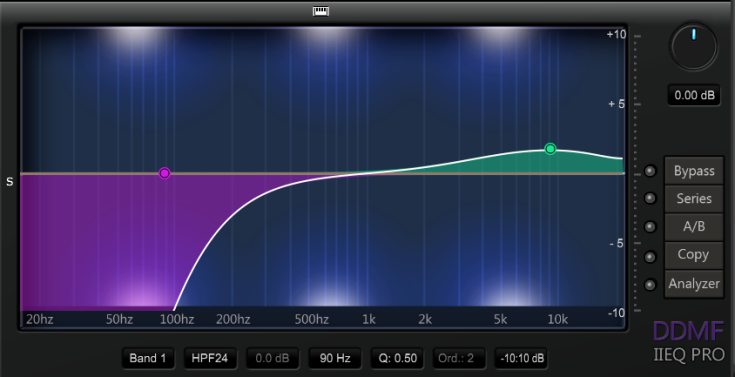
Hp/+Lp filters – This always comes first for me. Its a simple EQ that filters out the extreme lows and extreme highs.
Low – Filter out anything below 35 hz with a 24 db slope. This keeps any unnecessary rattling in big speakers. AND will give us a tiny bit more overall volume.
High – Filter out anything above 17.5 k with either a brick wall slope or a 48 db slope. This is mostly just noise that a lot of people cant hear anyway so why not get rid of it? It might give you an extra half db in the end which can be very pleasant during these loudness wars.
2.) Saturation
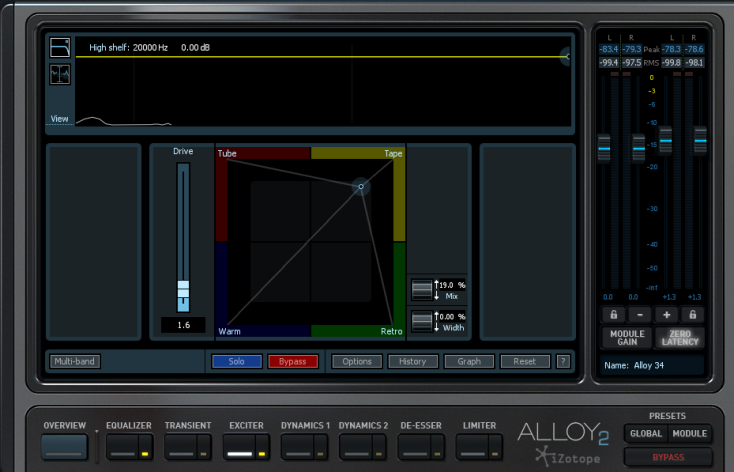
This is my favorite part. There are so many flavors out there. Simply applying some saturation to the overall master can really help glue together the different sounds you have. Just be careful as too much is a possibility. I use alloy 2’s exciter module as there are 4 different flavors to choose from and each band can have a different level of saturation.
The idea here is to be modest and A/b.
4.) General compression
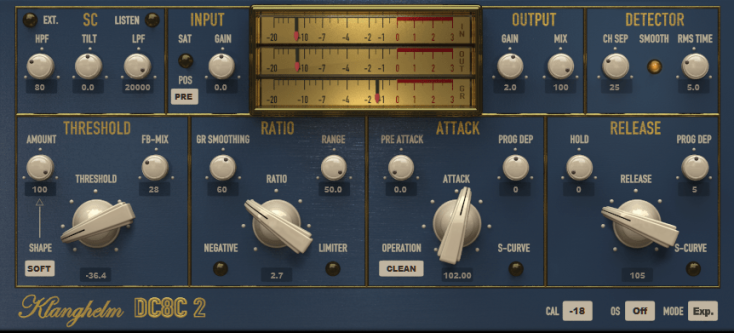
This stage is so confusing to so many of us. General compression to me is just to apply a small amount of overall leveling to the master. This extra step will give us an extra db or so in the final out come.
Try not to focus on the settings too much, but the below settings i have provided work well. Just make sure your not using higher than a ratio of 4, and a attack shorter than 50.
Attack – Long – 100 Milliseconds (Ill explain later)
Release – Long – 100 Milliseconds
Ratio – 2 – 4 (4 being for harder hitting tracks that need the extra volume)
Threshold – Bring this down until your getting 2-4 db gain reduction.
By using a slow attack, we are going to be compressing not the transients, but the part after the transients. Our limiter (Coming up) is going to be catching our peaks, and very efficiently. We really do not need to squash the transients any further then that.
5.) Stereo Processing
Mid/Side EQ – This is something that can make a huge difference. Simply filter out the low end of the side information. Take a mid/side EQ and filter out 150 hz from the sides. You can also bring up the sides in volume a bit here as well, just don’t go over board if your mix is already fairly wide.
Mono low end – There are many tools that will help you do this. I use Waves Vitamin but its overkill. The idea is to make sure your low end is hitting right down the middle.
6.) Limiting
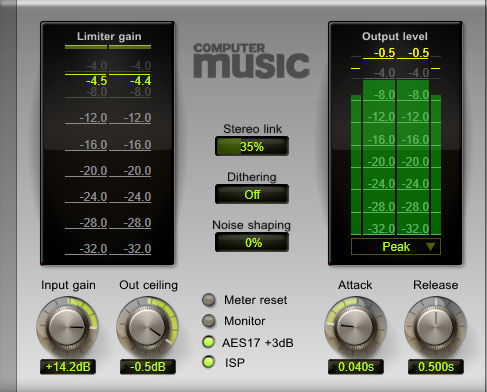
This part is basic.
First set your ceiling to -1 to -.5 db. This will prevent any stray peak from getting distorted when your converting the file to MP3.
Simply grab your (Almost any) Limiter and reduce the threshold until your eating all of the peaks. If you start seeing anything other than peaks being caught, back off as your now compressing the signal beyond what is necessary (Which is what the compressor is for ).
Summary
That all folks. I do hope this basic chain can help some of you out there that are having trouble. Its not a fix all but damn is it close. Just remember, its whatever sounds good to you that matters.
- Luke

Leave a comment